With so many Windows Mini PCs coming from China, there is a chance that you’ll need to change Windows 8 language to English after a factory reset.
When I first reset my Ainol Mini PC, the Windows setup process was entirely Chinese. To save you all the pain and suffering I experienced, I decided to put together this step-by-step guide on how to change Windows 8 language to English.
This guide assumes that you know how to factory reset Windows 8 and are starting from the Windows 8 setup process.
I completed this process on my Ainol Mini PC. However, the process should be identical for other Windows PCs.
I’ve highlighted important parts of the screen in red in the screenshots below.
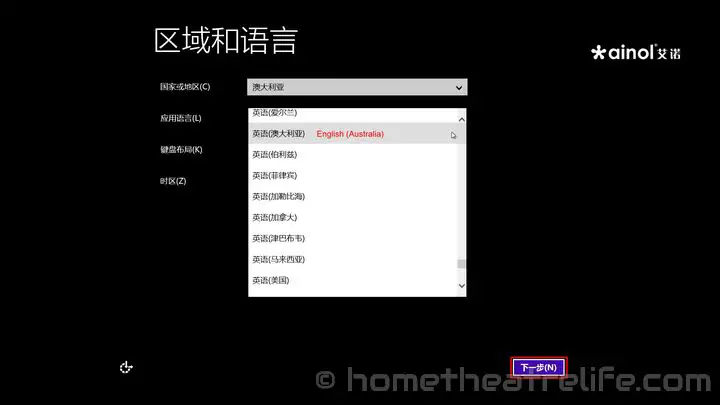
1. Select your Country and Language
First you’ll need to select your country and language. This is probably the hardest part.
Google Translate will be your friend here, as unless you read Chinese, you’ll be matching characters like I had to.
For your reference:
- Australia is “澳大利亚”
- English is “英语”
- United States is”美国”
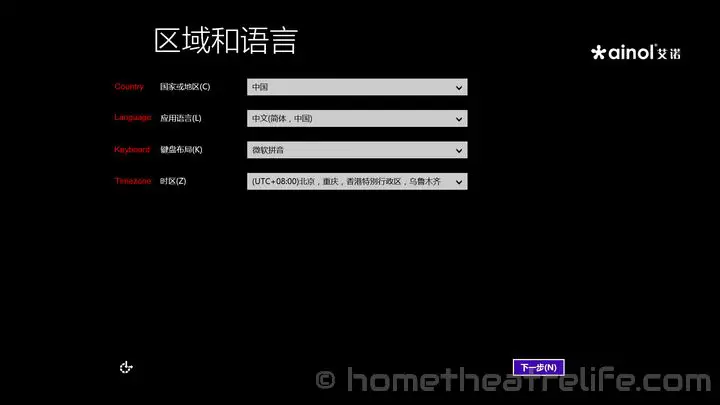
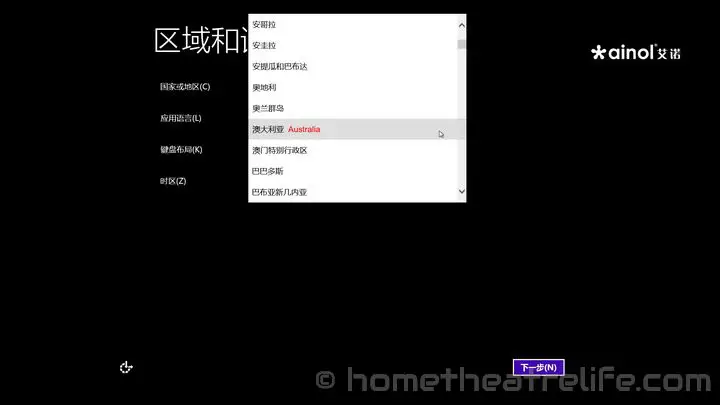
When selecting your language, each English entry has a corresponding country. Look for the correct combination:
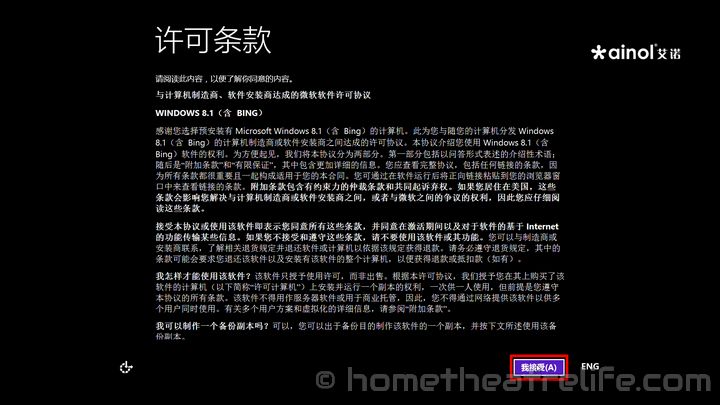
2. Accept the Windows 8.1 with Bing Privacy Policy
Simply click the Next button:
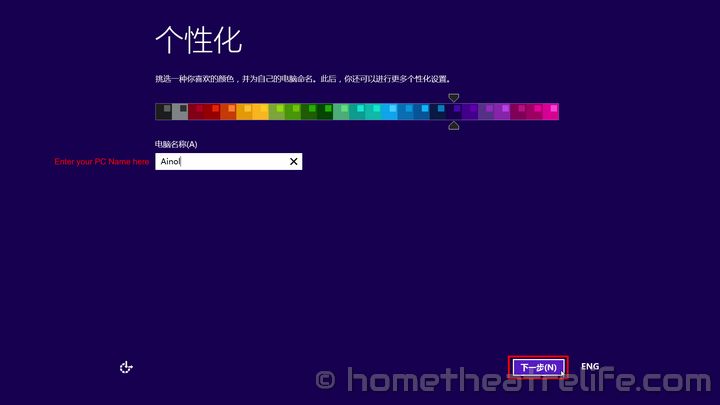
3. Set up your PC
When prompted, connect to your wifi. Then select your desired UI color scheme and enter a name for your PC in the provided textbox:
Accept the Express setup option which will configure various options for Windows 8:

You’ll then get to a screen where you’ll either need to log in to your Microsoft Account or you may see the screen below. If so, select “Create a Local Account” and enter your desired Account name:

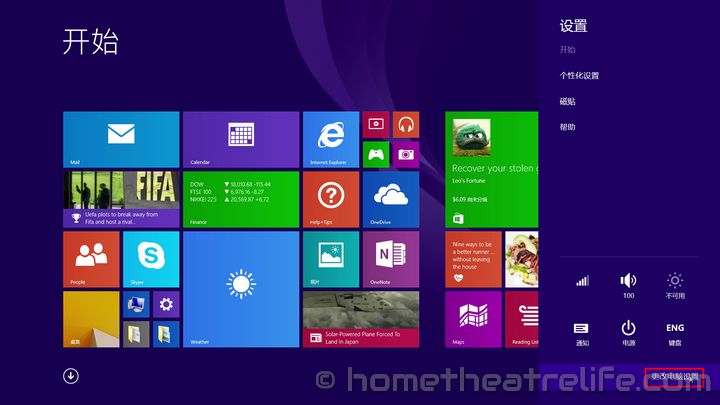
4. Change the Windows 8 Display Language to English
Go into Settings, then select Control Panel at the bottom:
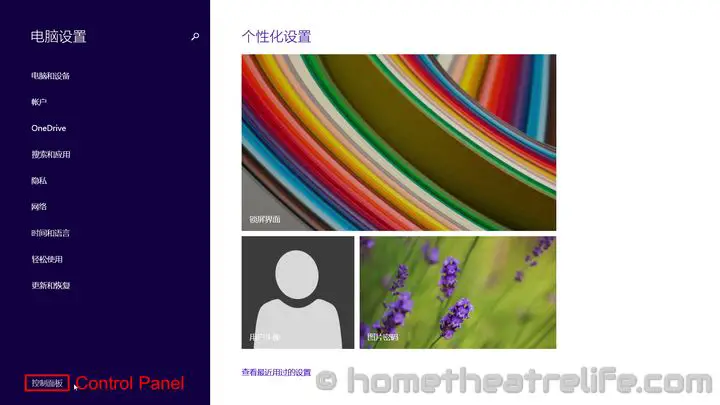
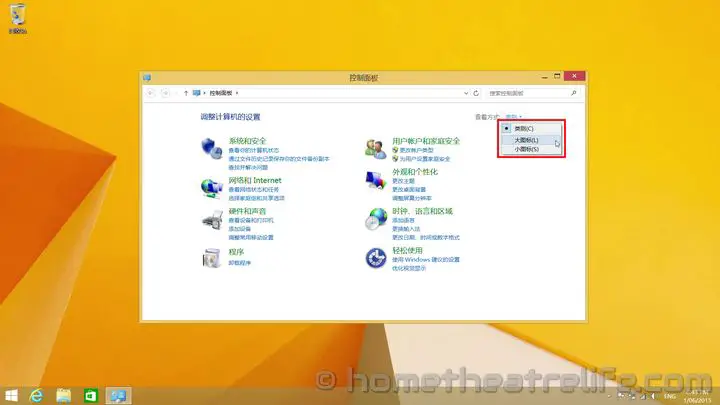
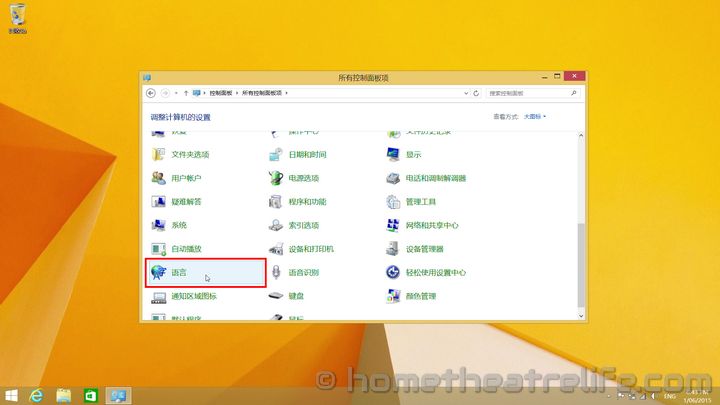
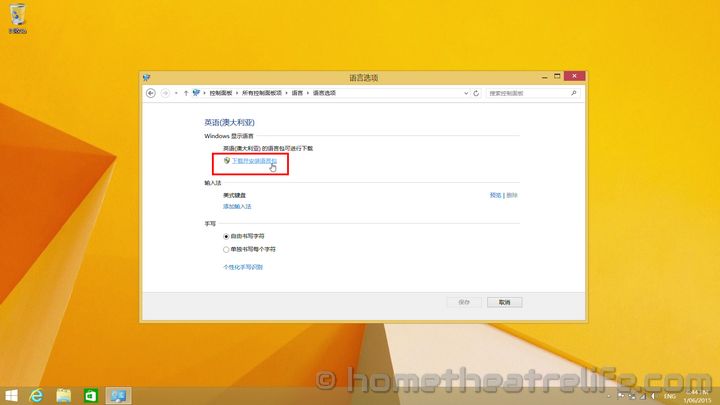
Here, you should see the language you selected in Step 1. Go into Options for that language:

You should see a link with a Administrator prompt. Click on it to begin downloading and installing the English Language Pack:
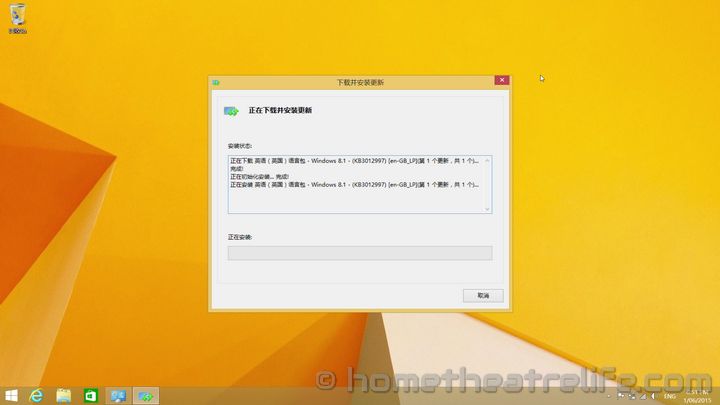
When the installation is complete, you’ll need to reboot. When Windows 8 reboots, you should notice the Windows 8 language will have switched to English. However, there are still some parts of the UI that will be in Chinese. We’re almost there but there are a couple more settings to change.
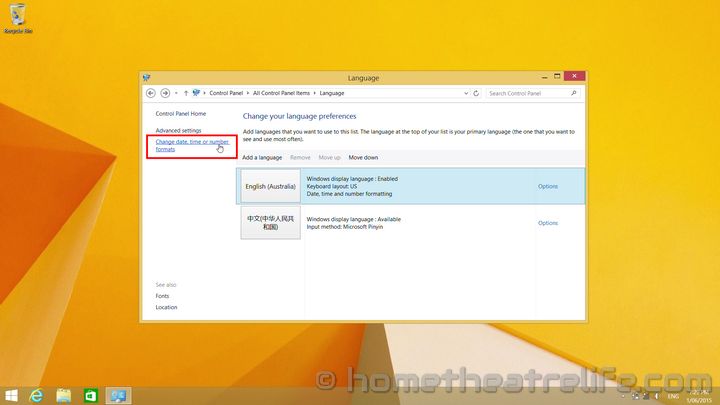
5. Copy your Windows 8 Language Settings to the Start Screen
Go back to the Languages control panel like before:
Click on “Change date, time or number formats”:
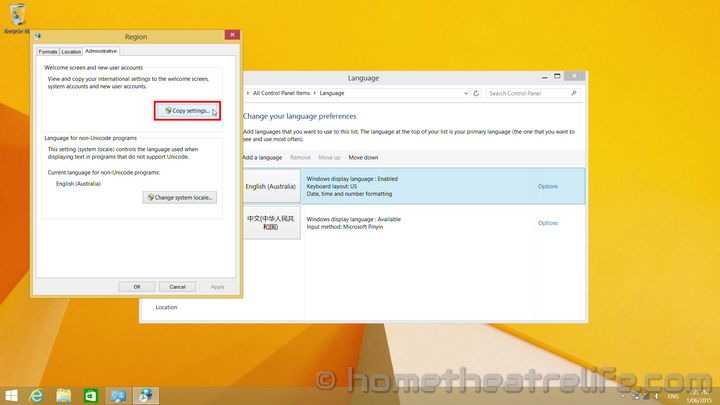
Click on “Copy settings…”:
Select the two checkboxes at the bottom and click “OK. This will ensure that the language used on the Start and Login screens is also English:

Accept the prompt to reboot and you should have successfully changed the Windows 8 language to English: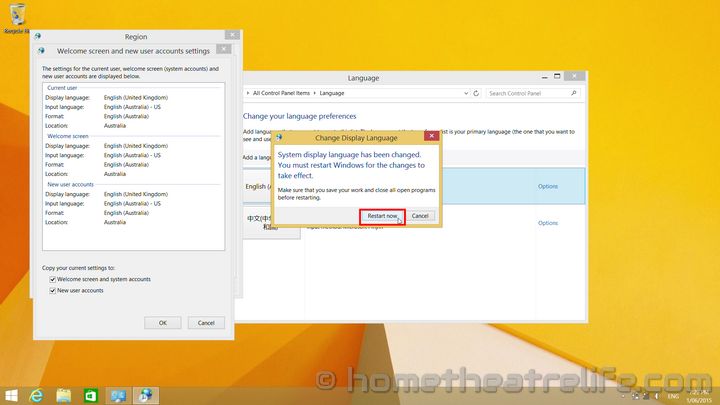

Thanks for this, not a Windows guy so not at all familiar with the environment. My new Voyo miniPC came preloaded with 32-bit 8.1 w/Bing in Chinese, desperately needed English. You da man.
Thanks for the feedback! I’m glad it was of use.