I’ve had so many questions from you, my readers, about how to setup Kodi so I decided to put together my Kodi Setup Guide.
There’s no doubt that Kodi is the media frontend. Whether you’ve got a HTPC or an Android TV box, Kodi is a must-install application on your streaming device to give you the best multimedia experience.
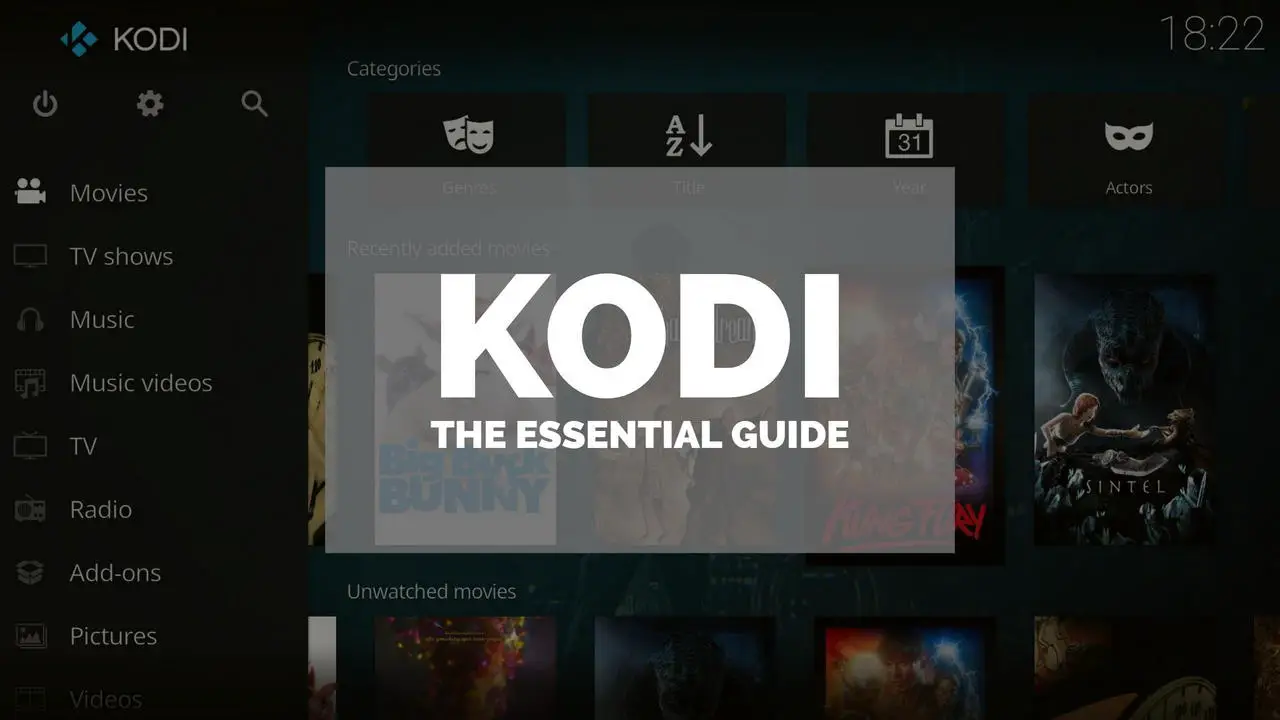
“How to Set Up Kodi: The Essential Kodi 17.0 Setup Guide” will take you through the installation and configuration to ensure you get the best out of your Kodi setup.
Whether you’re wondering how to setup Kodi on Android, Windows or even LibreELEC, the process is essentially identical regardless of platform so my guide’s got your back!
With that out of the way, let’s get started.
What’s in this Kodi Guide?
Table of Contents
What is Kodi?

At its core, Kodi (previously known as XBMC) is a media player that plays back an impressive array of multimedia, including videos, music and images.
However, calling Kodi just a media player would be doing it a massive disservice.
Kodi also features a 10-foot user interface that’s designed for use on TVs and with remote controls.
It also handles streaming media from a wide variety of sources, including local and network storage, AirPlay, UPnP and the internet.
It’s incredibly user friendly, insanely customisable and immensely powerful.
Kodi Background
Whilst Kodi seems new and shiny, it comes with an exceptional legacy behind it.
Kodi is actually the new name for XBMC. XBMC started back in 2003, as an evolution of the Xbox Media Player on the Microsoft’s original Xbox, acting as an intuitive frontend to media playback and games on the newly hacked console.
As time progressed and the original Xbox was phased out of production, Xbox Media Centre outgrew its roots.
As part of the movement away from its console heritage, the software re-branded as XBMC and was usable on a variety of platforms. Over the years, it has grown immensely popular due to its combination of stability, diverse features and immense customizability.
However, its legacy has caused issues with some referring to it as Xbox Media Center rather than XBMC – whilst an innocent mistake, the use of Microsoft’s trademark potentially put fans in Microsoft’s crosshairs. Thus, Kodi was born.
That’s enough history, let’s get on to setting up Kodi…
Organise your Multimedia First

Before you start setting up Kodi, it’s important that you get all your media files in order.
Kodi will use filenames and paths, as well as information stored inside files (called metadata) to work out what they are. If you don’t have your files organised properly, Kodi won’t be able to recognise them properly.
Organising your media files is a surprisingly in-depth topic which I’ll cover in another guide. For now, I’ll share my preferred layout for multimedia to keep everything super organised.
Each media type should be organised into its own folder for easy cataloging. For example, I’ve got separate folders for Movies, TV Shows, Music, and Pictures.
I use the same layout whether the files are stored on my HTPC or my server. This makes it really easy when I’m looking for something in particular
Organising TV Shows
When organising your TV shows, I recommend using the following layout:
/TV Shows/{TV Show Name}/Season XX/{TV Show Name}.SXXEXX.{Episode Name}.{Filetype}
Where XX is the appropriate Season or Episode number according to TheTVDB.com.
So for example, if we picked the first episode of one of my favorite TV shows “Family Guy”:
/TV Shows/Family Guy/Season 1/Family Guy.S01E01.Death has a Shadow.mp4
If you’ve got what TheTVDB calls a Special (like a holiday special that’s not considered part of the season), put them in as Season 0 and the episode number as per TheTVDB.
Going back to my Family Guy example, if we had the “Family Guy 100th Episode Special“, it’s path would be:
/TV Shows/Family Guy/Specials/Family Guy.S00E09.Family Guy 100th Episode Special.mp4
It’s pretty straight forward thankfully though using a tool like TVRename can handle a lot of the hard work for you.
Organising Movies
For movies, I typically prefer to have each movie inside its own folder. This is because it allows me to all related files such as cover art together:
/Movies/{Movie Name} ({Year})/{Movie Name} ({Year}).{Filetype}
I always include the year as Hollywood has a tendency to recycle names which causes confusion (thanks Ghostbusters (2016)!).
As an example, let’s take Star Wars: A New Hope:
/Movies/Star Wars – A New Hope (1977)/Star Wars – A New Hope (1977).mp4
Any other files relating to Star Wars: A New Hope would also go in that folder.
Organising Music
Unlike video files, music files (typically MP3s) can store information about the music inside them in what’s known as an ID3 tag.
An ID3 tag is holds information about a music file such as the Artist, Album Name, Track Name, Track Number and more.
If you’re music files are missing tags, a tag editor such as MusicBee (my personal favorite) or TagScanner can help fill in the gaps.
Kodi will actually use this information to build its music library but it’s still useful to keep your music files in a logical folder layout.
If your music files are tagged correctly, many music managers can even organise your files into folders for you!
I like to organise music by Album Artist and Album for easy cataloguing:
/Music/{Artist}/{Album Artist} ({Year})/{Track Number} – {Track Name}.{Filetype}
For example:
/Music/Alkaline Trio/Crimson (2005)/01 – Time to Waste.mp3
For compilation albums, I set the Album Artist as “Various Artists” as there are separate artist and album artist tags.
Now let’s get on to setting up Kodi!
If you're planning on streaming movies and TV shows with Kodi, protect yourself with a VPN.
Why do you need a VPN for Kodi?- Anonymous online streaming
- Bypass geo-blocks and access ALL Kodi add-ons
- Prevent ISP throttling and tracking
- Hide Your IP Address
Protect your privacy and security when using Kodi. Subscribe to the highly recommended IPVanish VPN now (save up to 46% with this link) to stay safe and private or check out our Best VPN for Kodi guide to learn more.
How to Install Kodi 17
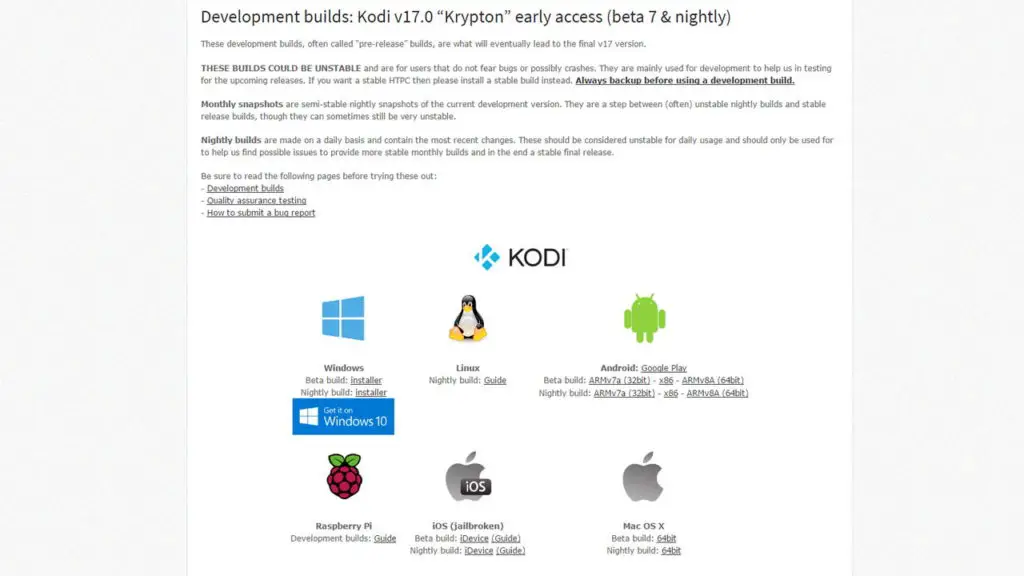
Kodi is available on a massive array of platforms, such as Windows, Linux, Mac and Android, so you can download Kodi 17.0 from a variety of sources.
The latest version of Kodi available is currently Kodi 17.1 Krypton.
Just head over to the Kodi Download page and download Kodi 17.1 for your platform of choice.
If you’re on a Windows 10 PC, you can download Kodi from the Windows Store.
Just open the Windows Store app, search for Kodi and click the green install button.
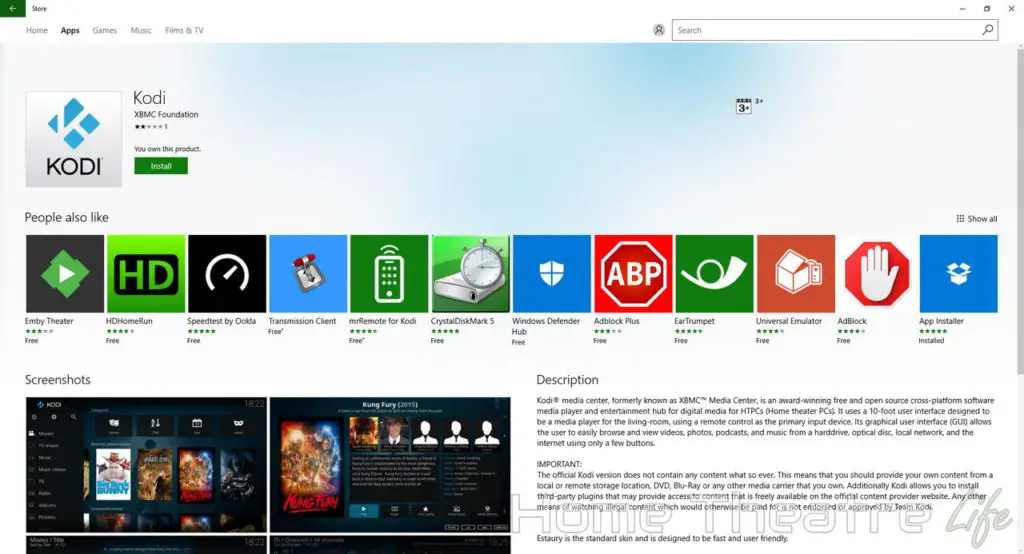
Downloading Kodi from the Windows Store is the best option if you’re on Windows 10, as the Microsoft Store will keep the app updated automatically so you’ll always have the latest version.
Those on Android can grab it from Google Play. Much like the Microsoft Store release, Google Play will ensure Kodi is automatically updated as new versions are released.
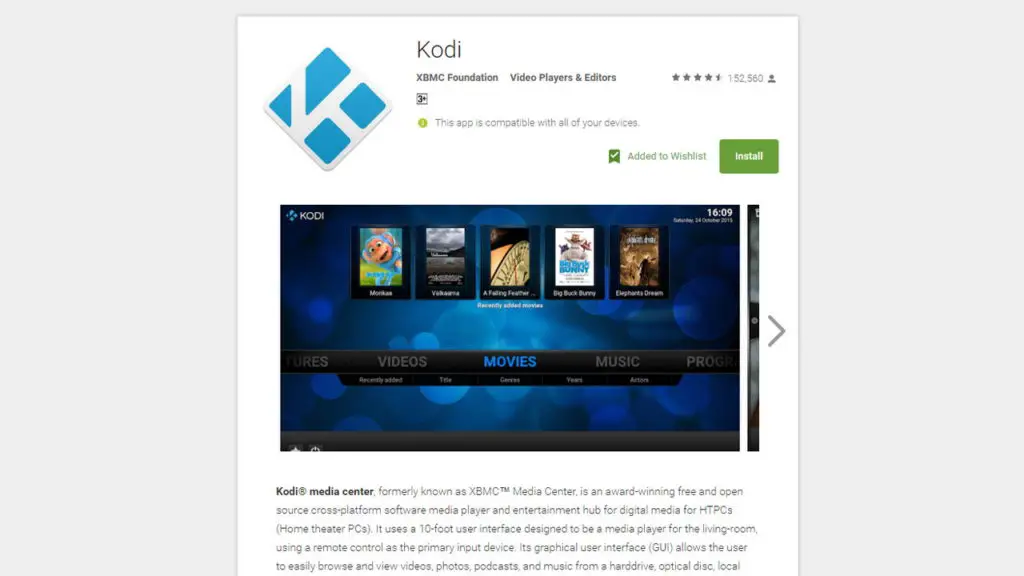
For the sake of this guide, I’m going to use Kodi 17.1 Krypton as it’s the latest version of Kodi available.
If you’re using the Windows installer, make sure you leave the installer set to a “Full” installation – This will install all relevant files and will offer you the most painless setup experience.
The installer will complete after some time and you will be ready to start!
Launch Kodi
Launch Kodi and you should see the Kodi splashscreen after a few moments:

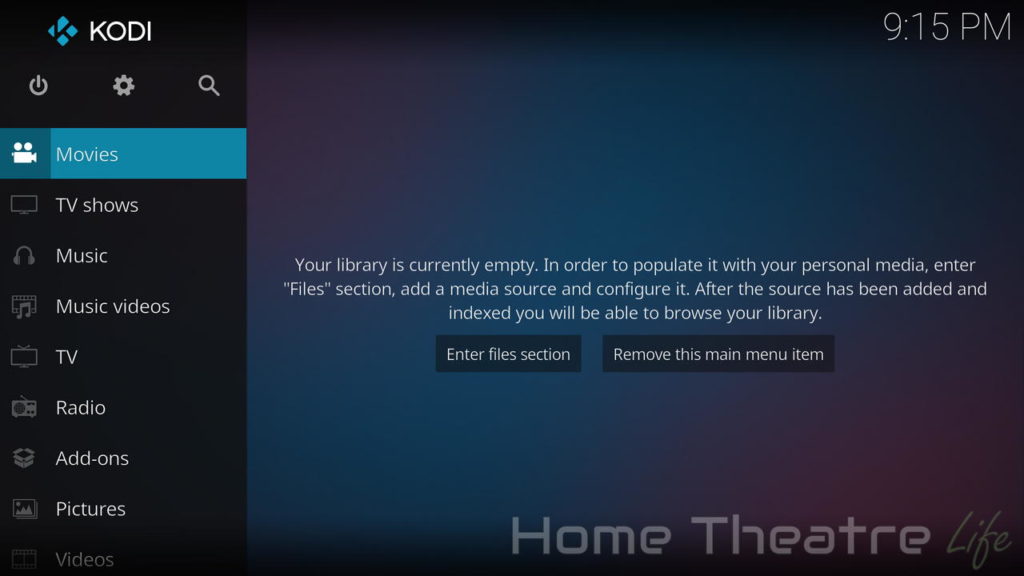
Before you know it, you’ll be seeing Kodi’s Home page with the new (and very stylish!) “Estuary” skin:
Setting Up Kodi
Now that you’ve installed it, it’s time to set up Kodi.
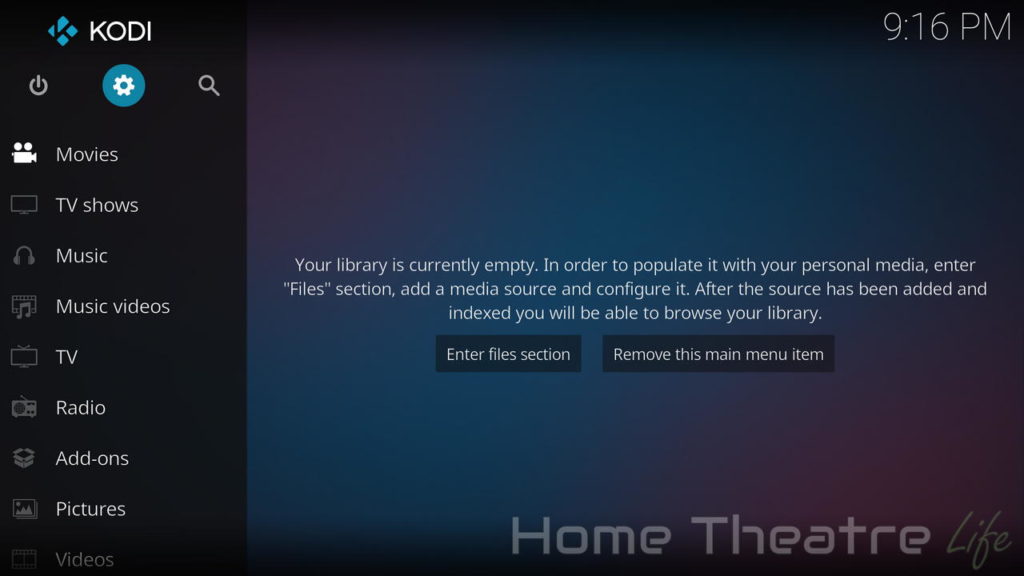
To access all of Kodi’s settings (and there’s a lot!), simply select the Gear icon on the homepage:
Change Language and Regional Settings
Kodi should automatically set the time for your based on your streaming device’s clock.
However, Kodi will typically default to a US region. If you’re not in the US (like this particular Aussie), navigate to Interface Settings>Regional to adjust your Region preferences.
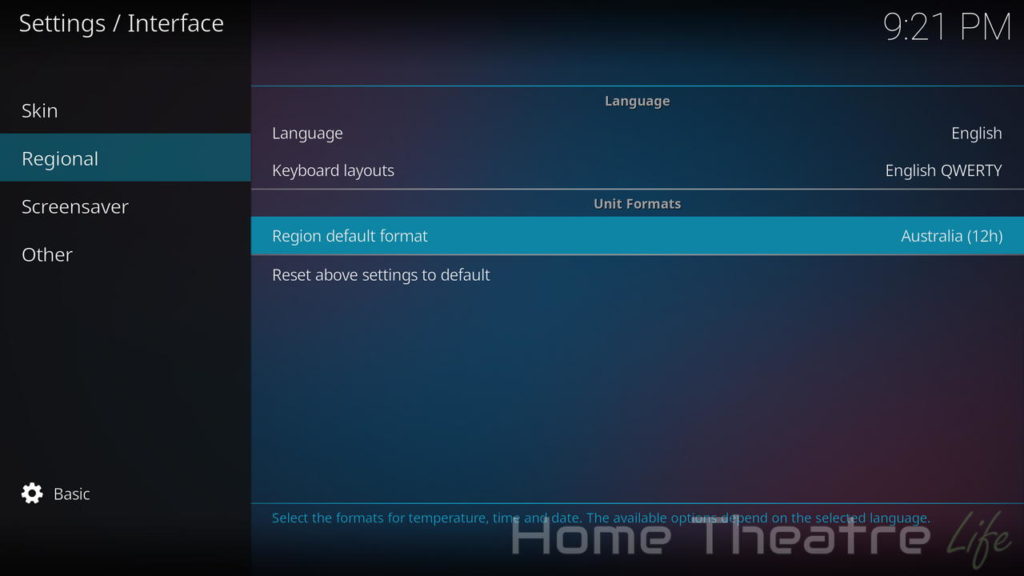
Here you can select your language and “Region Default Format“. This will change the most common regional settings such as time, temperature and speed units.
Configure Weather Settings
Kodi can show weather forecasts and other weather information. I’ll admit it’s come in pretty handy when deciding if the weather is nice enough to break my binge watching session!
To set up Weather for your area, navigate to Settings>Service Settings>Weather and select “Service for weather information“.
Kodi doesn’t come with any weather services out of the box so you’ll be presented with an empty window:
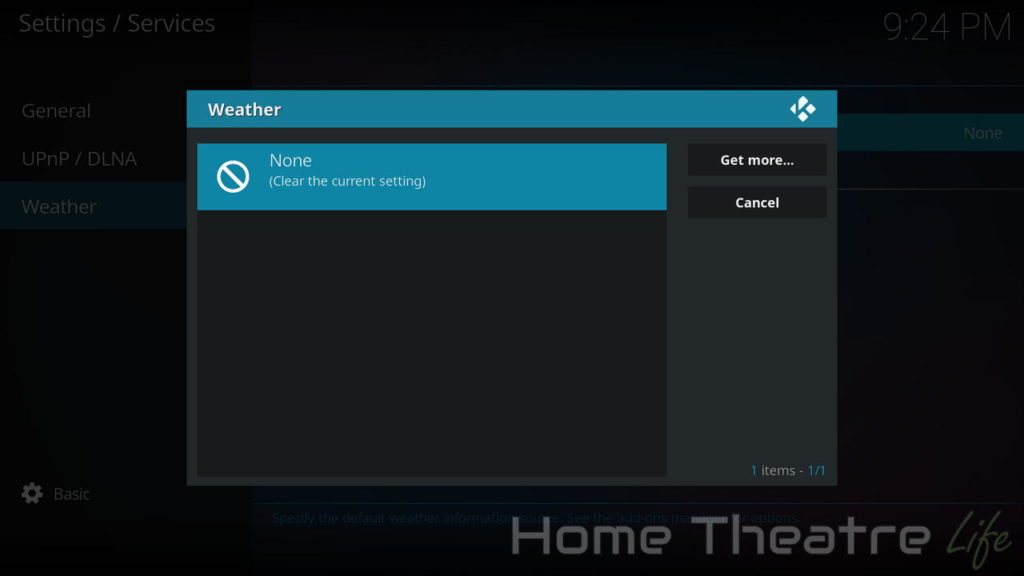
Select “Get More…” to see all the weather providers Kodi supports.
There’s a few providers available so I’ll pick Yahoo Weather as it’s the easiest to set up.
Kodi will automatically download and install the weather service for you.
Now select “Settings” to configure it. It’ll show you up to 5 locations you can monitor. Let’s set one up for now:
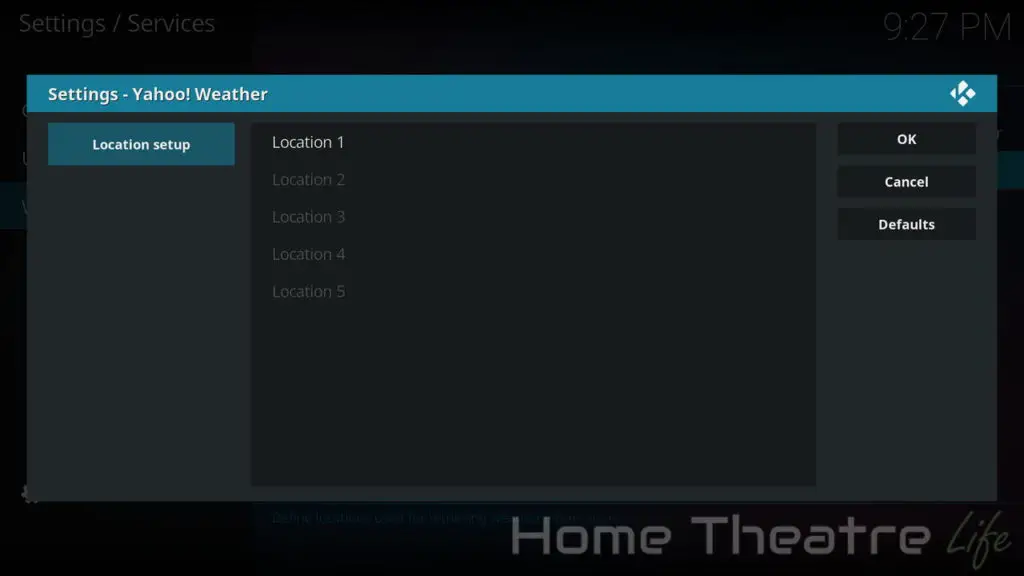
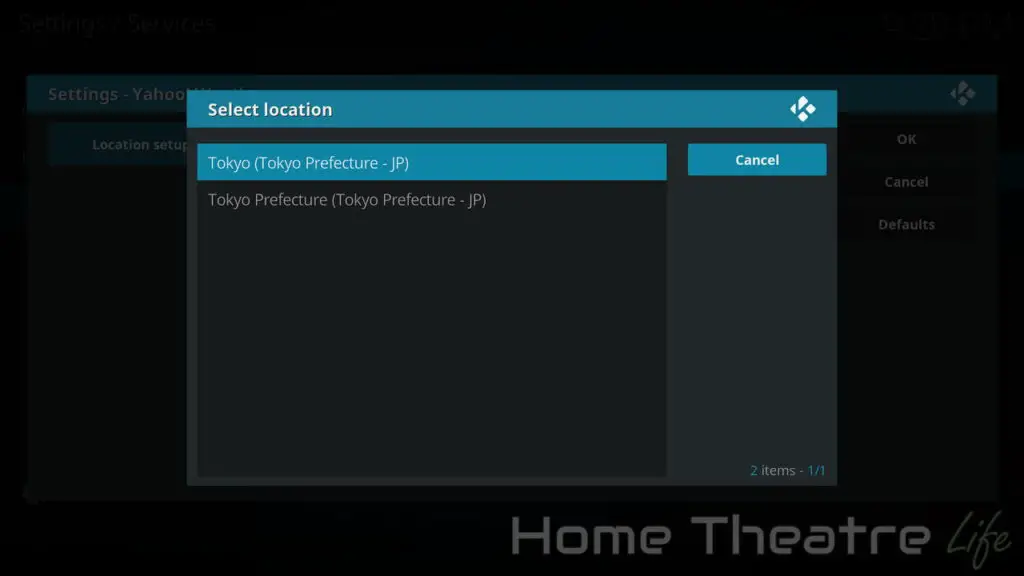
Select “Location 1” and type in your nearest location. I’ve picked Tokyo as an example. You’ll get some suggestions of possible locations. Just pick the one that’s closest to you:
Repeat the process for any other locations you want then click OK to save them.
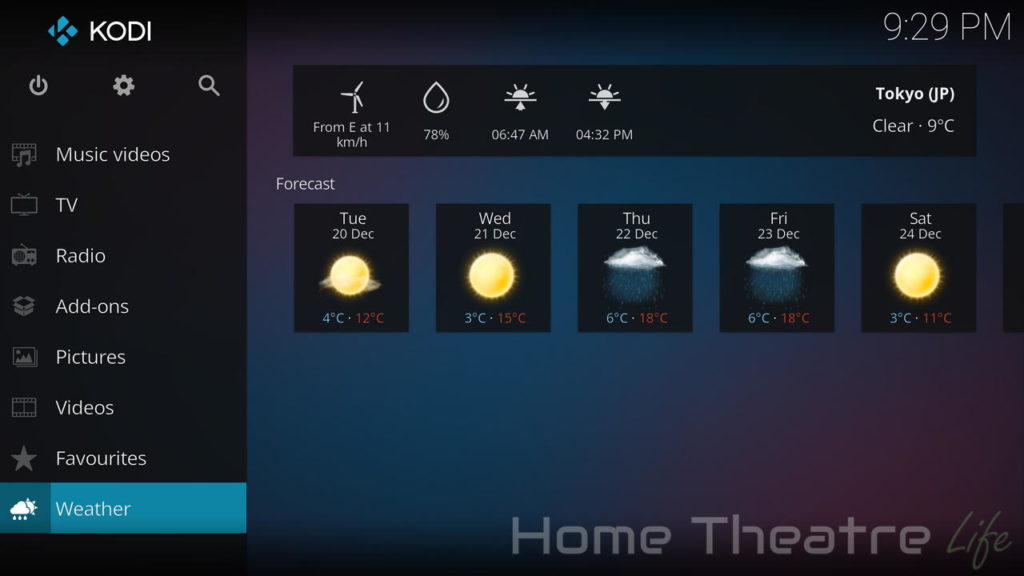
Now if you go to the Weather menu on your home screen, Kodi will show you the current weather and a forecast for the week. Neat huh?
Enable Some Other Important Settings
There’s a few settings that I strongly suggest you enable so you get the most out of your streaming device.
Now some of these settings are hidden in the Basic settings level so you’ll need to enable Standard settings or above.
To do this, open one of the Settings menus and look for a gear icon and the word Basic in the bottom left corner.
Select that until it changes to Standard or above and more settings will appear.
Enable Automatic Refresh Rate Switching
Kodi offers automatic refresh rate switching which basically syncs your display (like your TV) refresh rate to that of your video.
Without going into too much detail, it’ll make your videos look much better if your streaming device supports it.
If you’ve got a Windows HTPC or Linux-based Kodi distribution running, you should be all good.
Those using Android TV boxes, this may or may not work depending on your firmware. That said, devices such as the Nvidia Shield and WeTek Hub will definitely work.
To enable automatic framerate switching, you’ll need to go to Settings>Player Settings and select “Adjust display refresh rate” and change this to “On Start/Stop“.
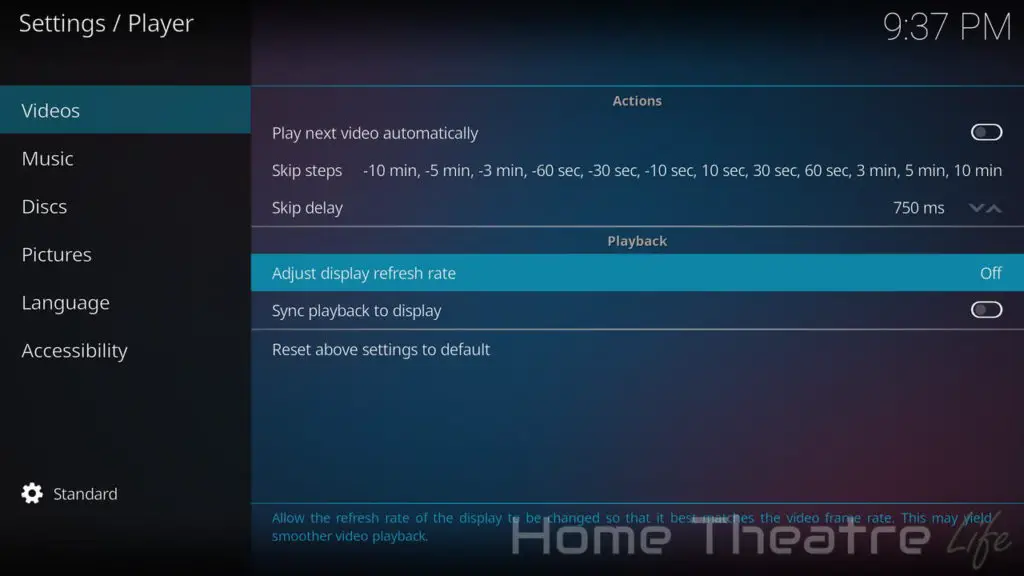
This means that when you start playing a video, if it’s framerate doesn’t match well with your display’s refresh rate, Kodi will try and change your display’s refresh rate to match the video and restore it after you stop the video.
This leads to much smoother looking video, particularly if you’re watching movies.
Enable Audio Passthrough
If you’ve got a device that supports audio decoding such as an amplifier, I’d recommend you enable audio passthrough to get the most out of your setup.
Navigate to Settings>System Settings>Audio and enable “Allow Passthrough“.
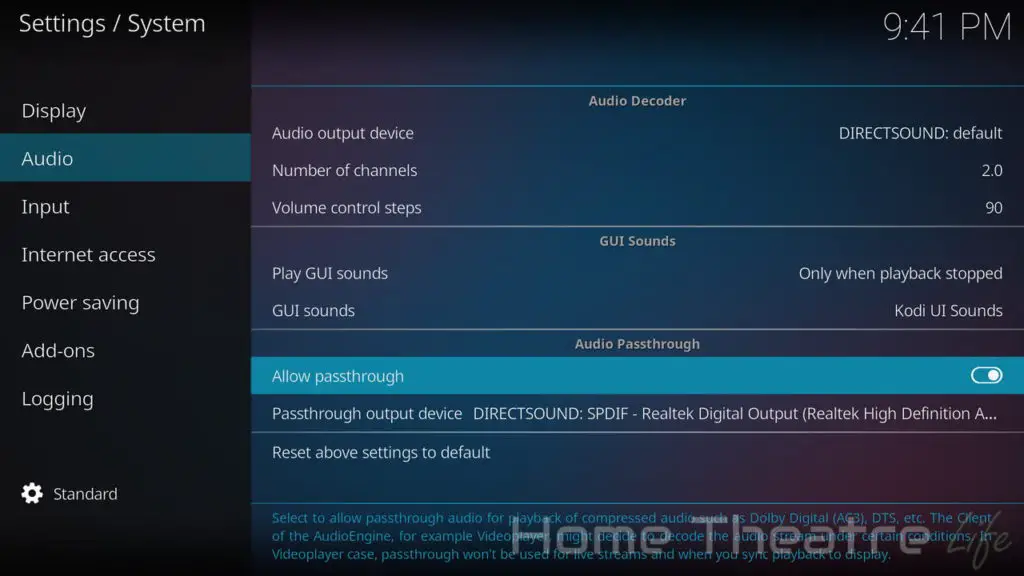
This will let Kodi pass through multichannel audio directly to your amplifier for decoding, allowing you to experience surround sound if your video has a multi-channel audio track.
Enable UPnP
Kodi is designed to be a comprehensive media solution and being able to stream multimedia like movies and music to it via UPnP is awesome.
To enable UPnP playback, navigate to Settings>Services Settings>UPnP/DLNA and select “Allow remote control via UPnP“.
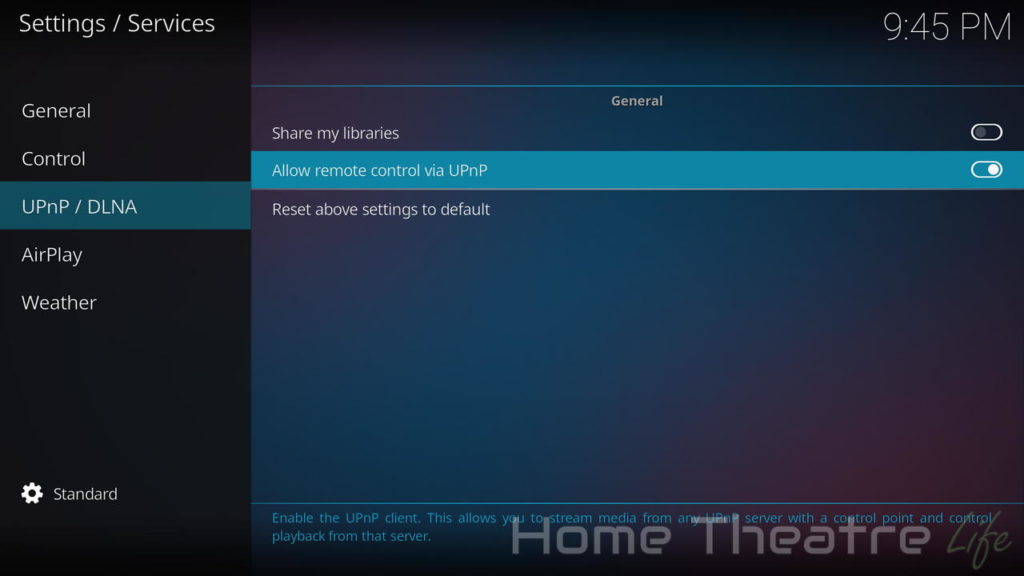
Kodi will now appear as a UPnP Renderer in supported apps so you can use apps like BubbleUPnP to stream videos directly to Kodi from other devices and even control playback.
I often use it to show music and videos from my smartphone on the big screen.
Enable AirPlay
If you’ve got any Apple devices, I’d recommend enabling AirPlay to allow you to stream music and videos to Kodi using Apple’s proprietary streaming technology.
First, you’ll need to make sure you have Zeroconf enabled under Settings>Services Settings>General. Turn on “Announce services to other systems” to enable it.
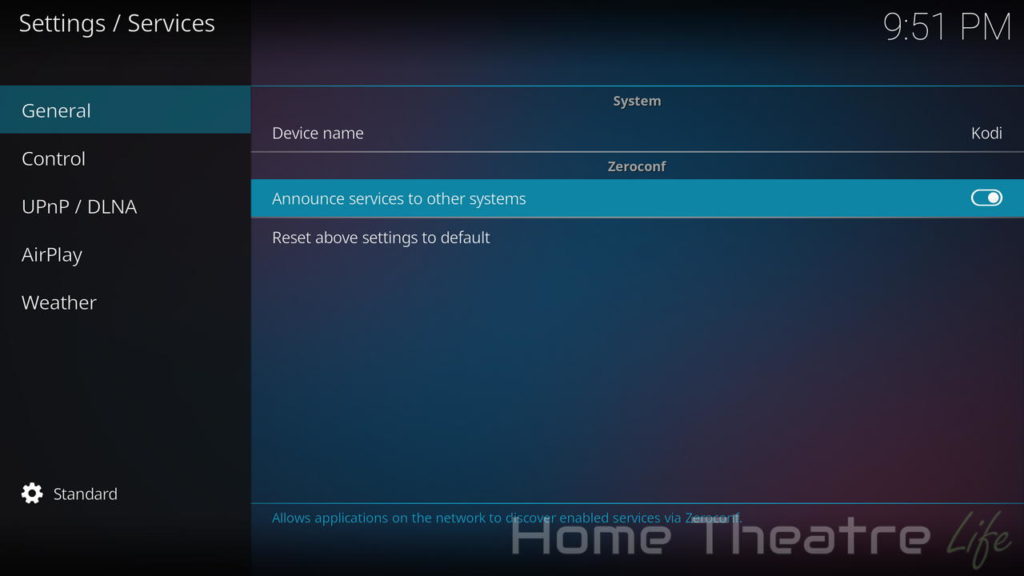
Now, go to Settings>Services Settings>AirPlay and enable “Enable AirPlay Support”
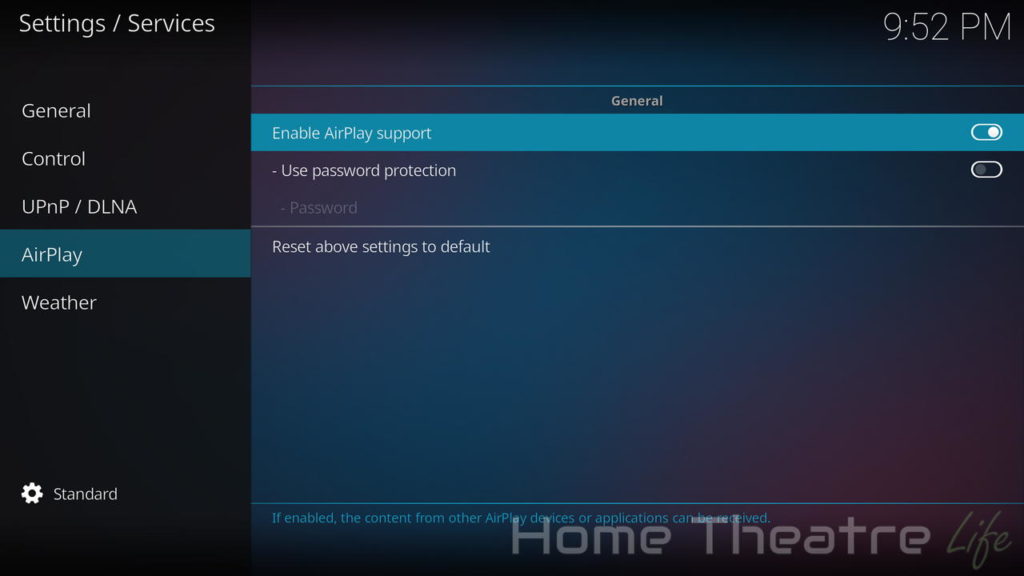
Please note that as Kodi is using an unofficial AirPlay solution, certain features may not work.
Enable Remote Control Support for Remote Apps
If you’re wanting to use your smartphone as a Kodi remote using apps like Kore or Yatse, you’ll need to enable Remote Control support.
Go to Settings>Services Settings>Control and select “Allow remote control via HTTP“.
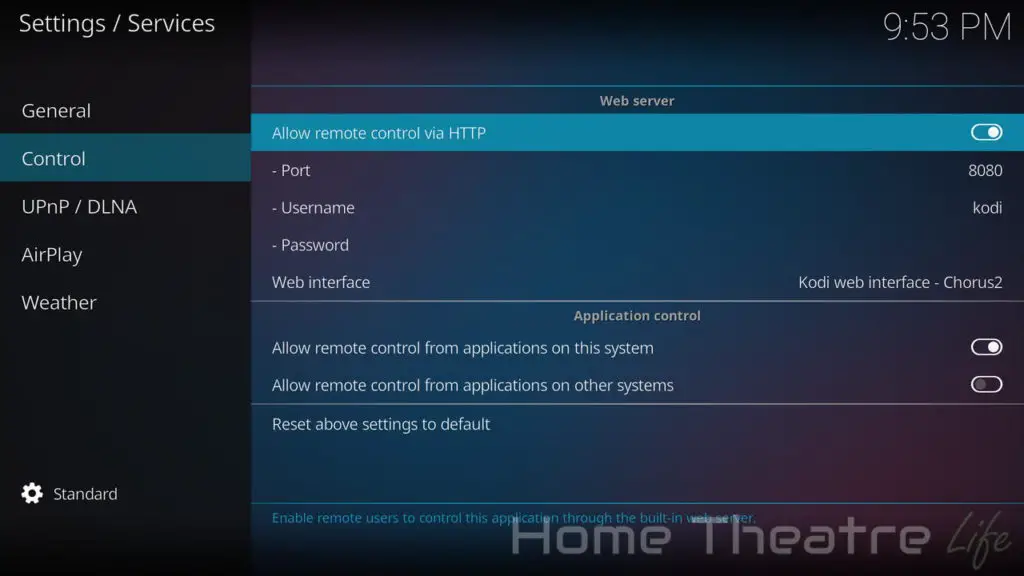
Now, you’re remote apps should be able to find your Kodi installation and control it.
Setting Up Your Media
What is the Media Library?

Kodi organises all your media by using a Media Library.
The media library is basically a database that houses a list of all your multimedia files such as movies and TV shows, along with other information about them.
This other information is called meta-data and includes things such as the year, actors and plots.
In order to get files into Kodi’s media library, you’ll need to tell Kodi where all your media files are.
The great thing about Kodi is that it doesn’t care where or how your media files are stored. So if all your movies are stored locally on your streaming device or you want to stream movies from your server, all you need to do is tell Kodi where your files are and it’ll handle the rest.
Adding Video Sources (i.e. TV Shows and Movies)
Go to Movies on your Home Screen. As no movies have been added yet, Kodi will take you to the Files section to add your sources.

Select Add Source and browse to the directory where you’re keeping your files. Let’s do movies as an example:
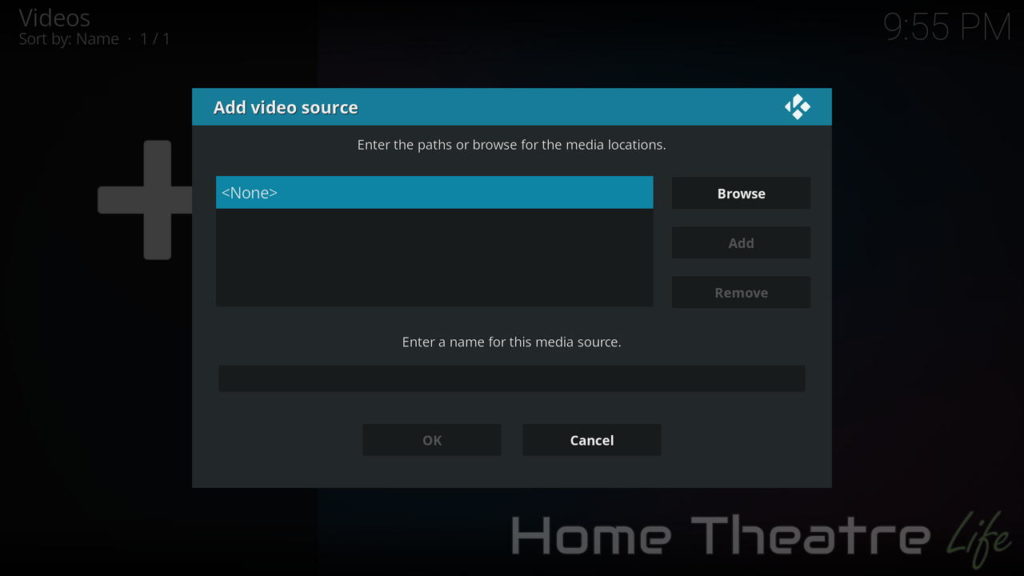
You can click on “<None>” if you want to enter the path manually or Browse to choose the folder that contains your videos:
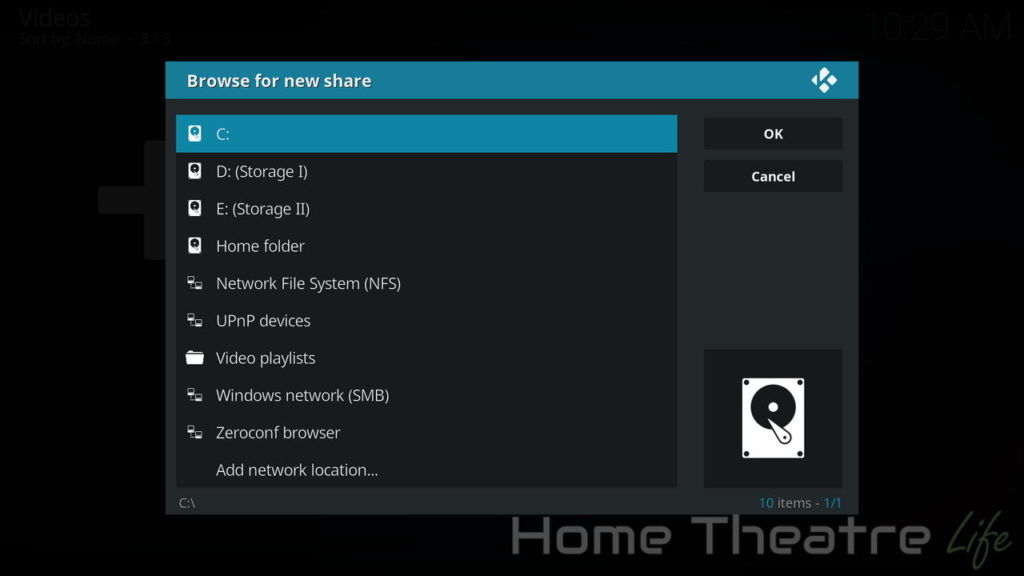
You’ll notice that the Browse menu contains both your local storage and networking sources. Kodi doesn’t care where your files are stored, it just needs to know where they are.
For example, if your files are on a Samba share on your server, just pick “Windows network (SMB)” and enter your share’s details to add it to Kodi.
Kodi will suggest a name for the media source based on the folder name. However, you can enter your own if you prefer.
Once you’ve chosen your media source and named it, click OK to save:
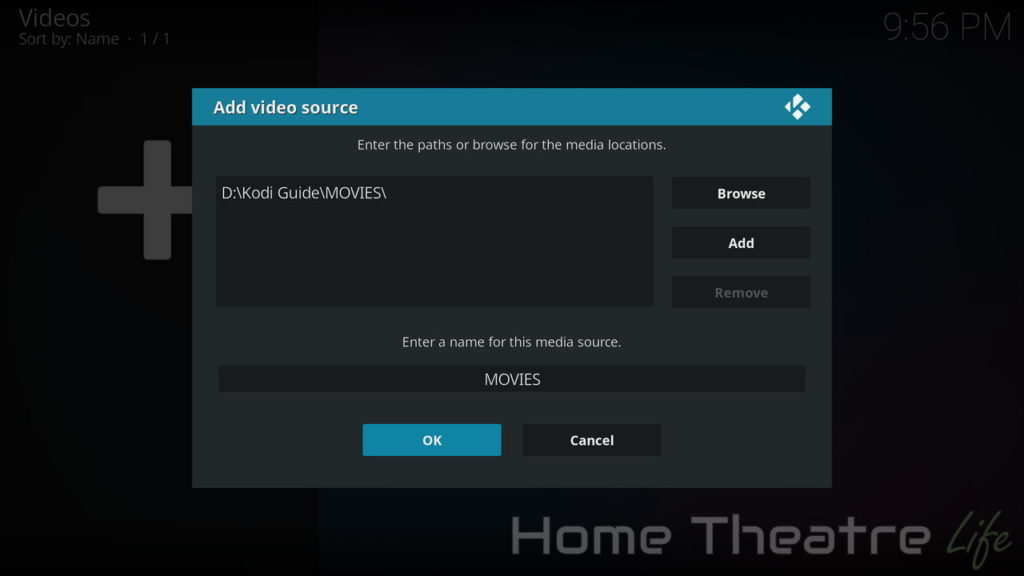
Now, Kodi needs to know what type of videos the folder contains. Choose This directory contains to tell Kodi what type of content it has in there such as movies or TV shows.
I’ve picked Movies in this example so Kodi will find the metadata (known as scraping) from The Movie Database:
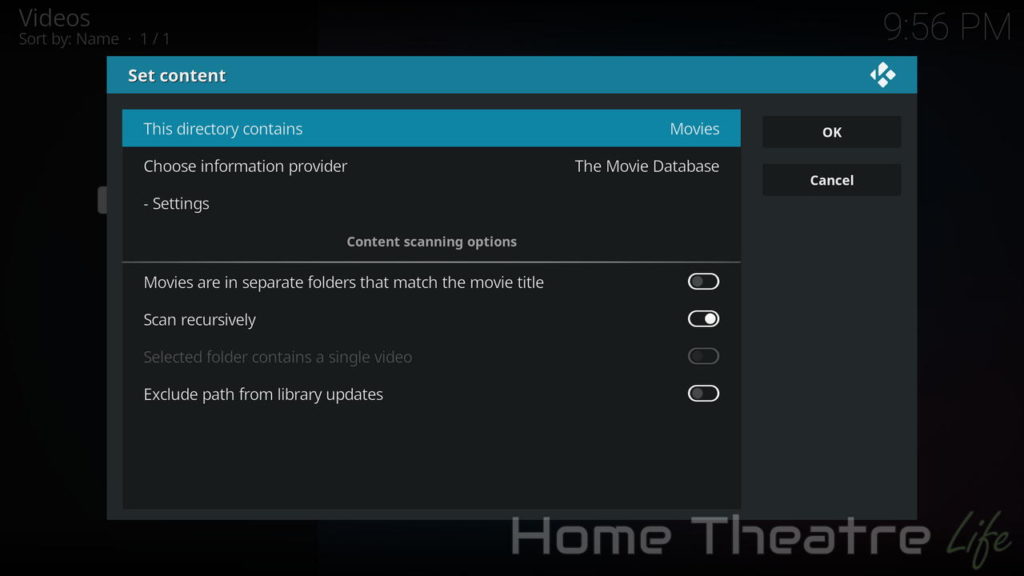
There’s also scanning options to help improve accuracy depending on your folder layout.
Kodi will then prompt you if you want to refresh your library. Say “Yes” and Kodi will get to work “scraping” your videos and finding matching movie titles:
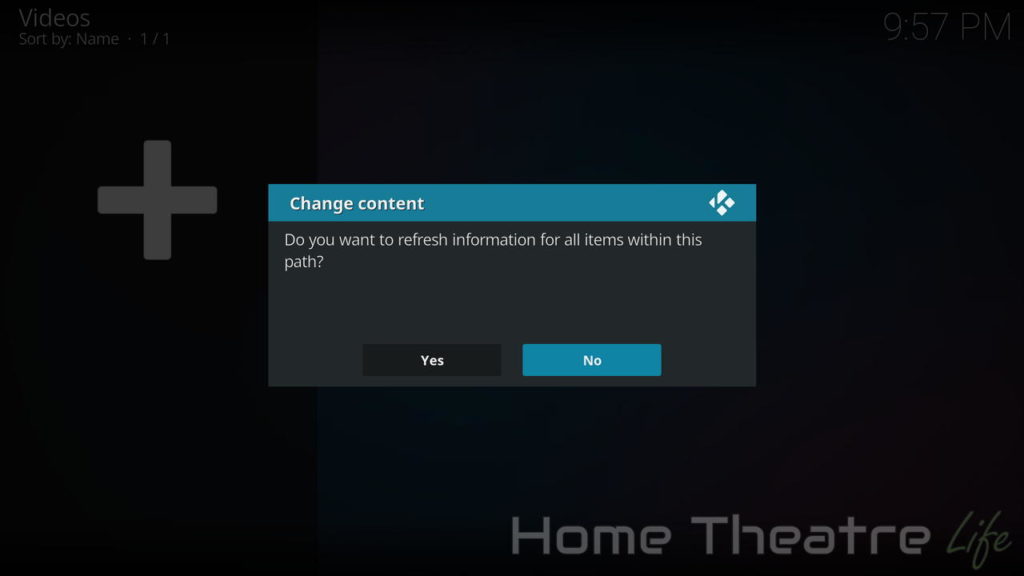
It’ll also download the appropriate metadata, as well as any cover art. Thanks to Kodi, your movie library won’t just be organised, it’ll look great too!
This process can take a while depending on the number of files you have and the speed of your internet connection.
Thankfully, Kodi can do this in the background so you can keep using Kodi while it does its thing.
When it’s all done, selecting Movies on the Home Screen will show you a list of all your movies organised in alphabetical order, along with appropriate cover art:
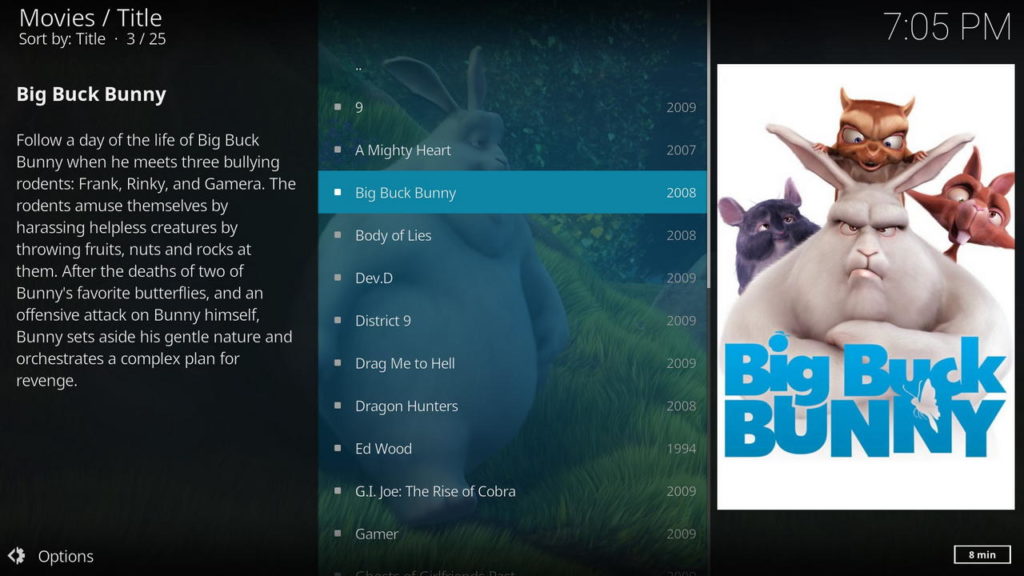
Adding Music Sources
Setting up music follows the same basic process as adding video sources, just with less options.
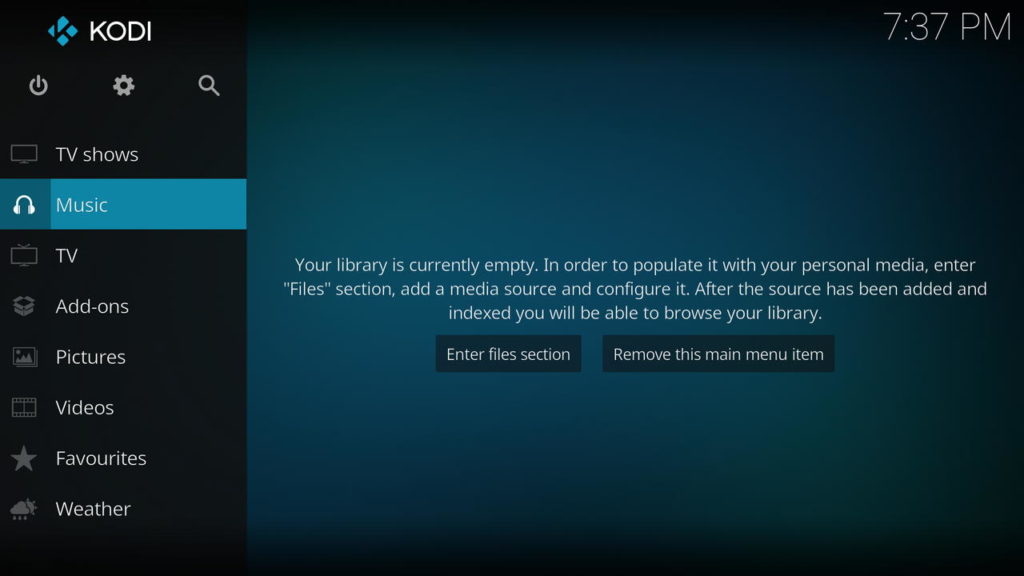
Enter the Music section on the Home screen then navigate to Files>Add music… and pick your music folder just as you did when you added your videos folder:
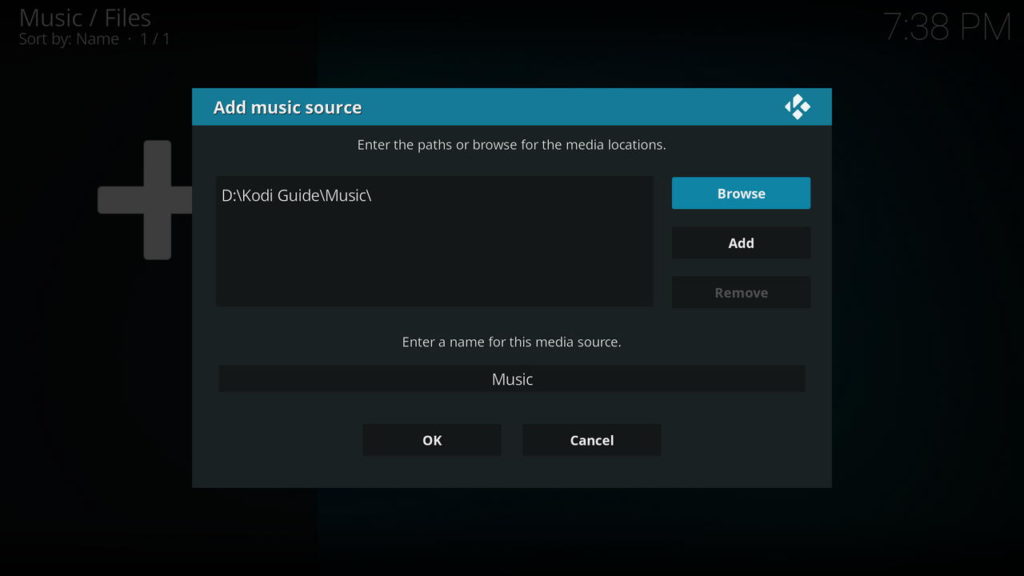
Click OK and accept the prompt to refresh the library:
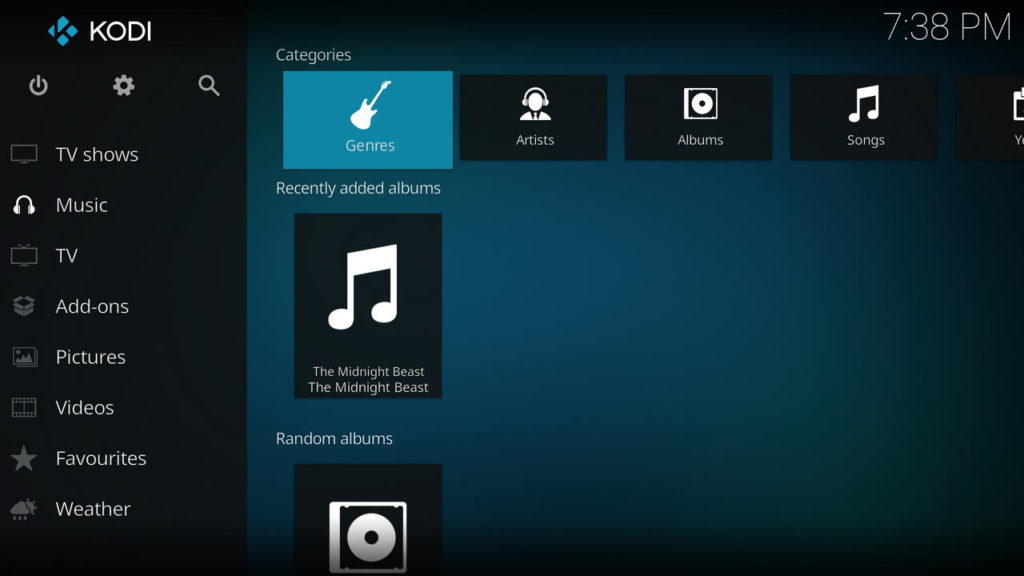
You’ll notice you didn’t need to tell Kodi what was in the folder as there’s no sub-types of music according to Kodi’s media library.
After Kodi has finished refreshing the library, you’ll see your albums (and any embedded cover art) appearing on the Home screen when you hover over Music:
Adding Picture Sources
By now, you should have got the hang of adding media sources. Pictures are no different.
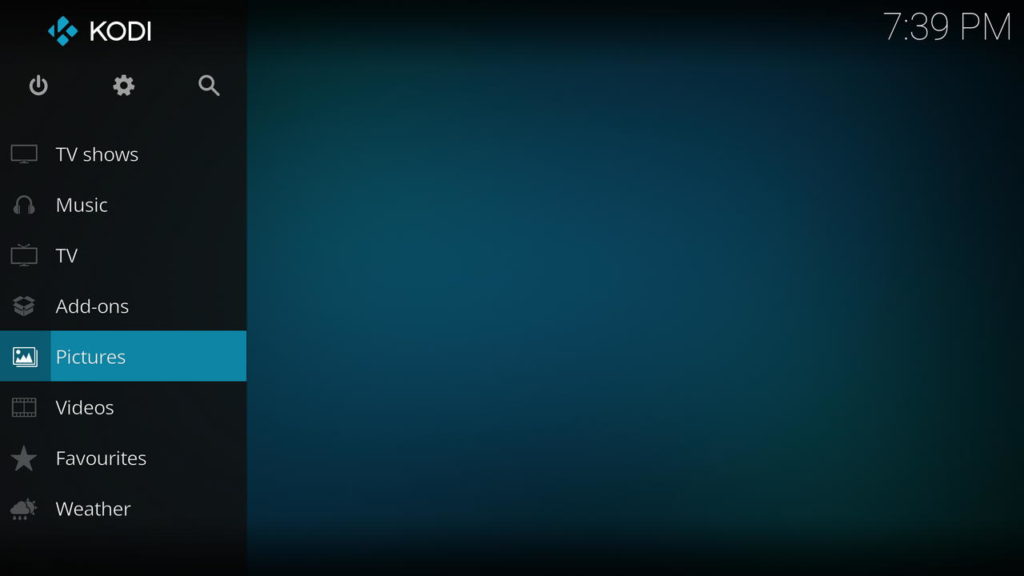
Enter the Pictures section on the Home screen then select Add pictures… and choose your Pictures folder as you did for your music and video folders:
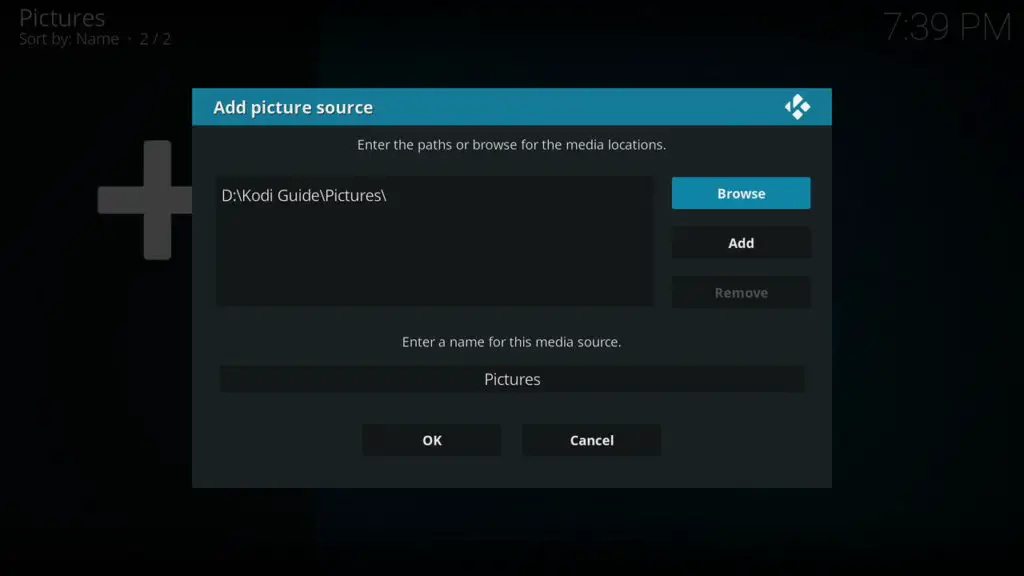
This time there’s no refreshing but opening Pictures will show you thumbnails of all your images to browse.
Customising Kodi
Install Add-Ons
Kodi supports addons which are plugins that can greatly extend Kodi’s abilities.
There’s an impressive array available, both official and unofficial, covering everything from new video streaming services to torrent clients.
Out of the box, Kodi comes with a few popular ones such as YouTube to allow you to get up and running quickly.
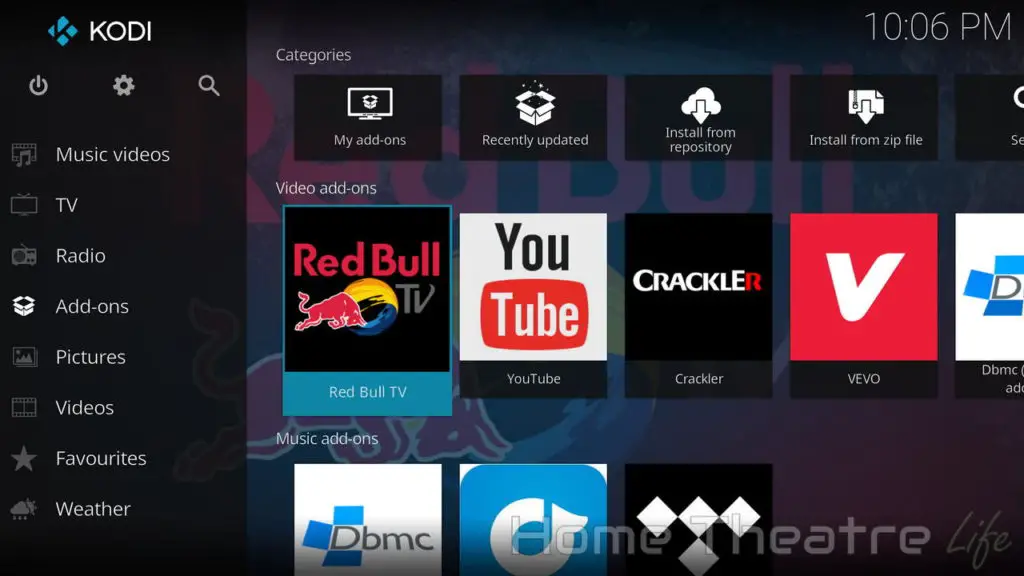
Let’s install the Red Bull TV addon from the official Kodi repository which will let us stream videos from Red Bull’s service.
First, navigate to Add-ons and select “Install from repository”:
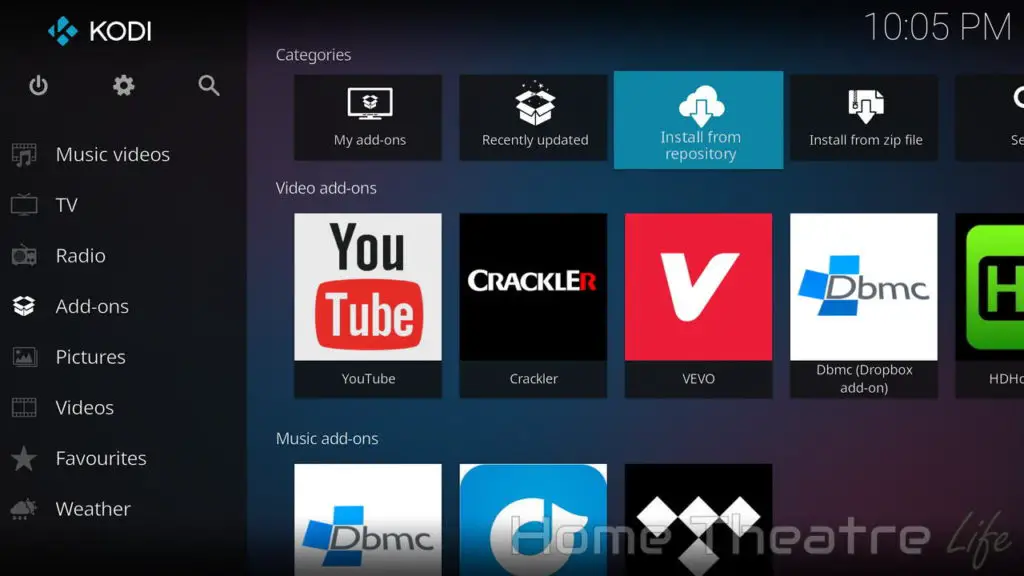
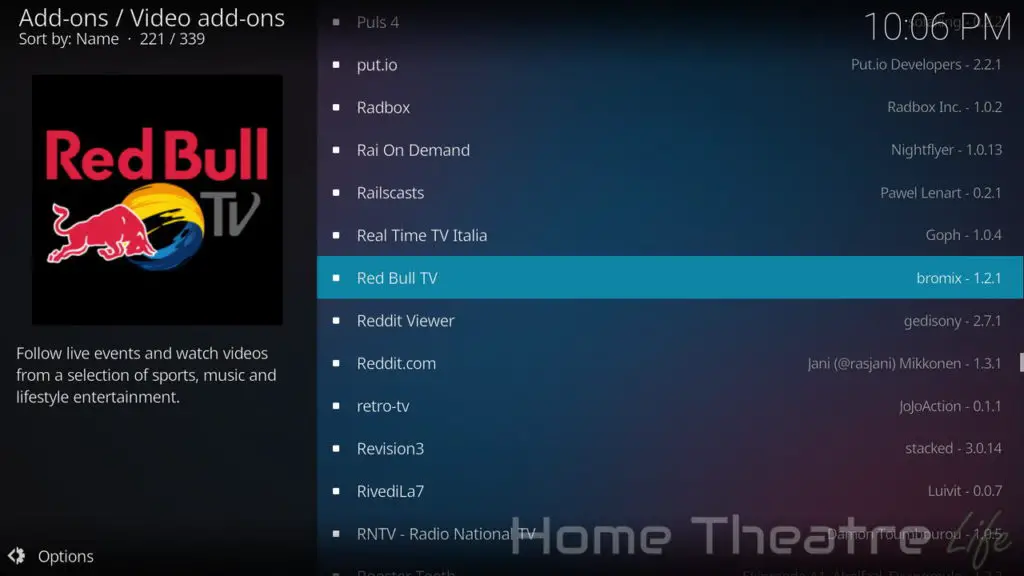
Browse to the Kodi Add-on you want to install. I’ve picked “Red Bull TV” but there’s hundreds in Kodi’s official repository:
Select it and Kodi will show you some details about the Addon as well as an Install button.
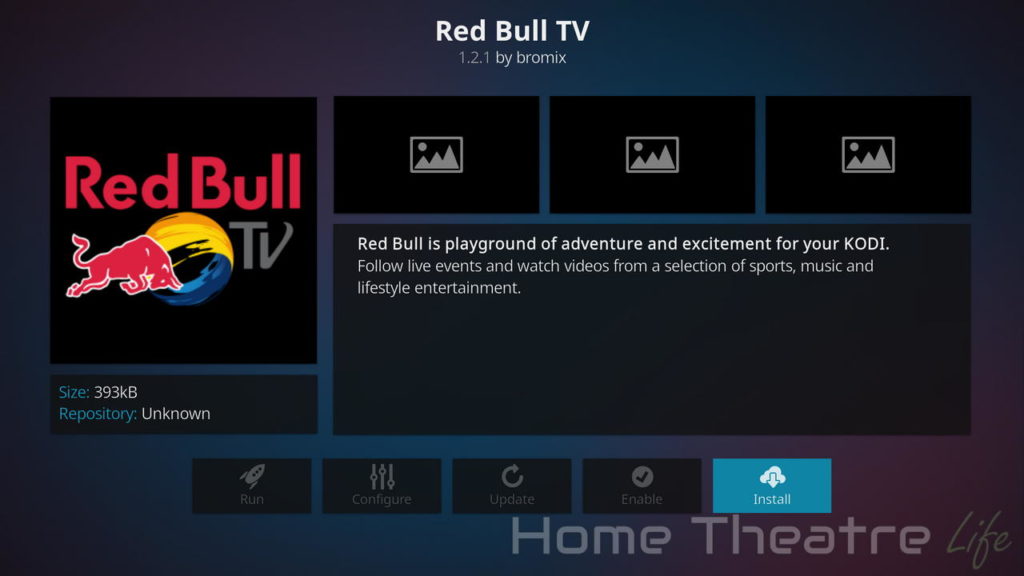
After you’ve clicked Install, Kodi will then download the add-on and any dependencies for you. You should see it appear on your list of add-ons on the Home screen.
Install New Skins
If you’re not happy with the default Estuary skin, the Kodi community has produced an amazing array of alternative skins.
To install a new skin, go to Settings>Interface Settings>Skin and select “Skin“.
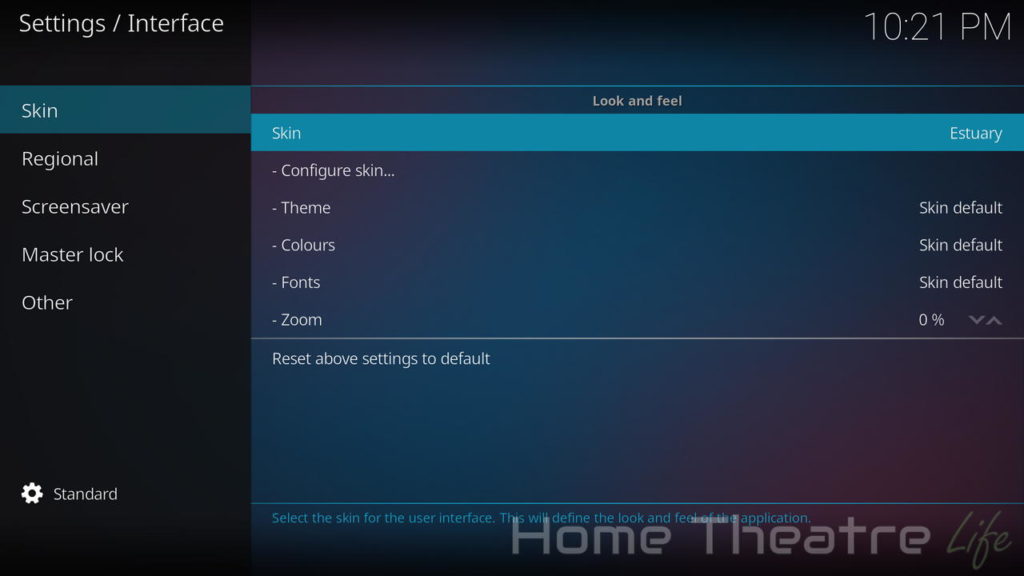
Kodi will now show you a list of installed Skins. If you’re wanting to change your current skin to one you’ve previously installed, pick it now:
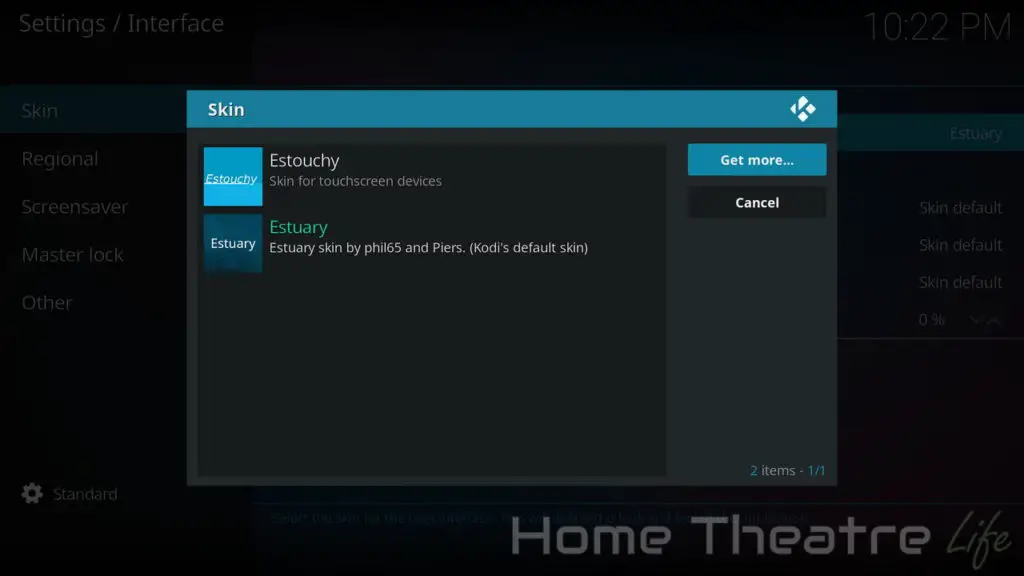
Otherwise, select “Get More…” and Kodi will fetch a list of all the skins available in the official Kodi repository.
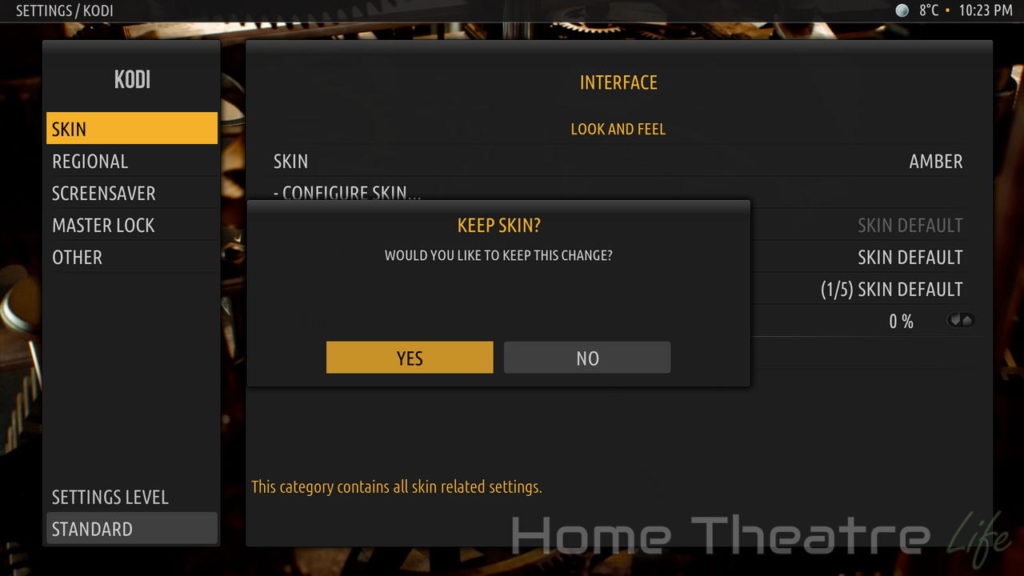
Pick one that you like the look of from List. My favorites skins are Amber and Aeon Nox so I’ve picked Amber for this guide.
Kodi will download and install the skin, as well as any add-on dependencies that it needs:
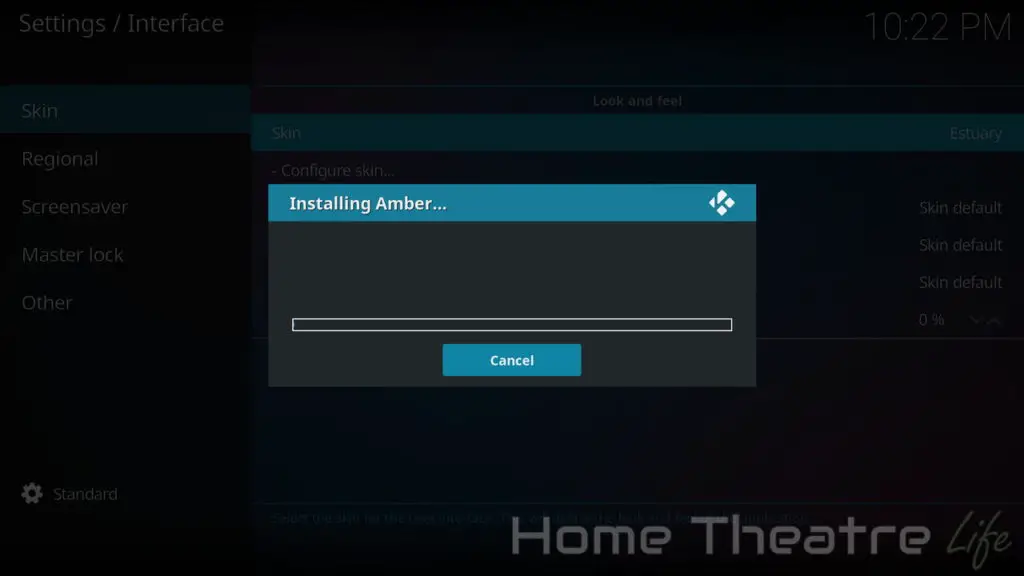
Once that’s done, it’ll ask if you want to keep the new skin. Confirm and you’ll have your stylish new skin:
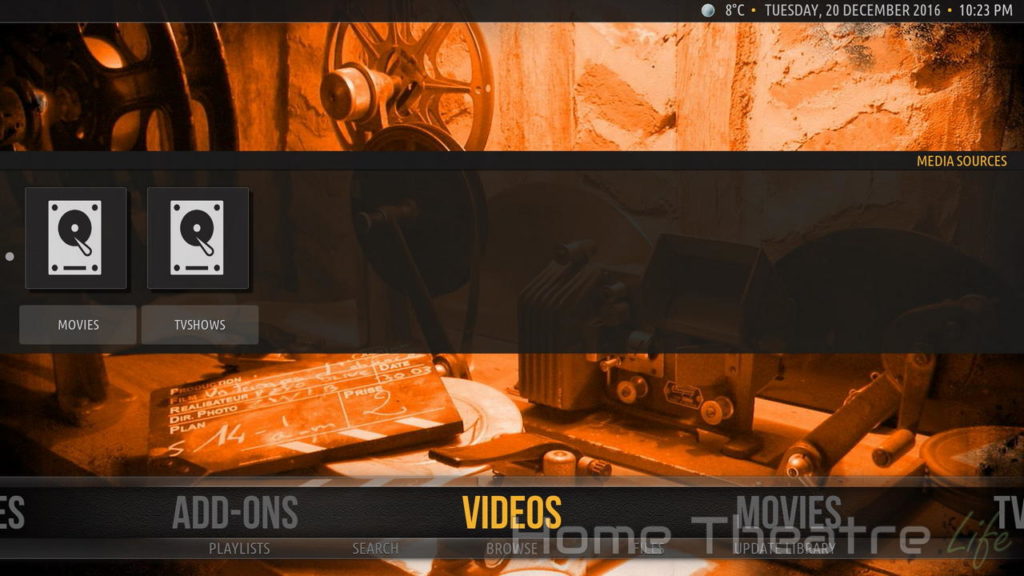
Check out Amber in all its minimalist glory!
Skins can be customised by going into “Configure skin…“. Each skin has its own settings you can tweak so I recommend playing around to see what you like.
Tweak Main Menu Items
Kodi offers a massive array of items on the main menu. However, you may not use all of them.
Let’s say you don’t have a TV tuner on your HTPC so you don’t want the TV menu.
Just navigate to Settings>Skin Settings>Main menu items and toggle the “TV” item to remove it from the home screen:
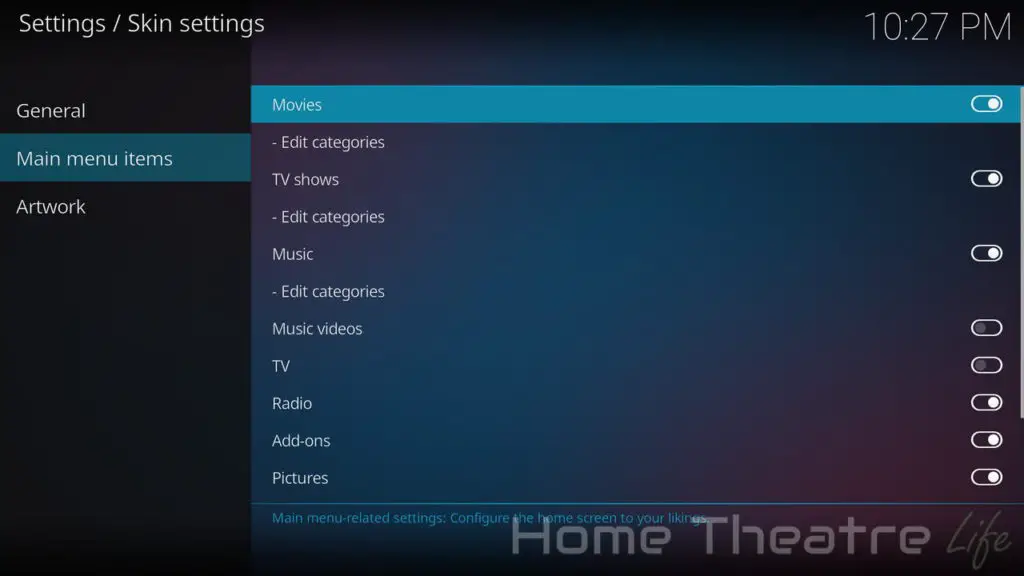
You can also make further adjustments, such as toggling Category shortcuts and more! Play around to customise the Home menu to your liking.
Enjoy Kodi
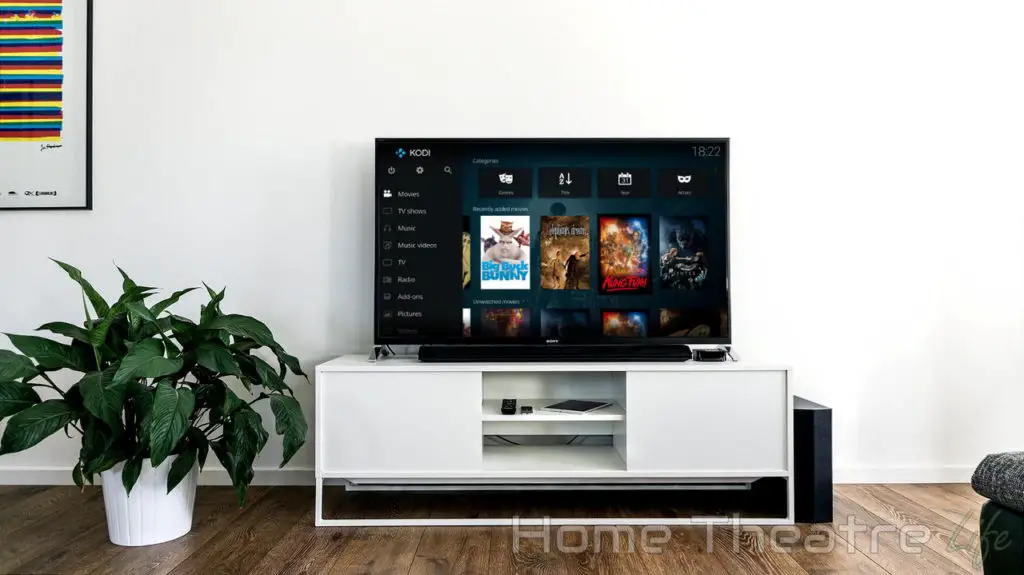
Phew, that was a long guide!
Now, Kodi’s such a massive beast and there’s plenty more to configure and tweak.
That said, my Kodi set up guide should have got you to the point where you can actually enjoy Kodi and what it can do.
All you need to do is grab the popcorn, sit back and enjoy the Kodi experience!
If you’re wanting more information, I’d highly recommend checking out the official Kodi Forums and Kodi wiki as they really are a wealth of information – particularly if you’re after information on some of the more technical or obscure elements of Kodi.
Have fun with Kodi!
Did you have any trouble setting up Kodi? Was there anything else you want me to cover? Let me know in the comments below!


Nice write up! Do you have any advice for adding music from an SMB share. Currently I’m finding is painfully slow to index my music even when connected via 100mbit ethernet.
Thanks for the feedback.
I feel your pain regarding indexing music Malachi. The biggest recommendation is to make sure your music is organised (i.e. Folders by Artist/Album) and then just wait. Once indexed, it should be a lot faster. I usually leave it on overnight.
The other option, if you’re using multiple Kodi devices, is to sync the databases via MySQL and let your most powerful Kodi machine do the scraping.
I never thought about syncing! I’ll give that a shot running the process first on my laptop.
Thanks for the heads up!
Still a way to go before Free to Air TV works well with any back end in Australia, be nice when that’s sorted, however, keep up the excellent work.
Have to agree Johnus. Free to Air TV is a bit of a mixed bag. I remember the nightmare it was when I built my first HTPC and it hasn’t got much better – particularly down here.
Will try to revisit in the near future to see if it has improved.